Sign our Guest book from around the World

Search This and Linked Blogs

Showing posts with label rainbow warriors. Show all posts

Sunday, December 19, 2010

How to Make the Perfect Broth, Consommé or Soup for your Hearty Appetite!

Vegetarian Chicken Soup
Vegetarians need not feel left out. The recipe below maintains the golden hue and soothing warmth of regular chicken soup, but instead of oily schmaltz it gets its depth of flavor from long-simmered garlic and vegetables. The addition of lemongrass provides a hint of bright citrus fragrance, which adds a welcome complexity to the broth. It is a simple-to-make alternative for the vegetarians at the table, and a satisfying start to any dairy meal. And while the chicken-free version cannot claim to have exactly the same healing powers as the original, a steamy bowl on Friday night still does wonders for the body and the soul.

Serves 4-6.

2 Tablespoons olive oil
1 large onion, roughly chopped
2 large carrots, peeled and roughly chopped
2 large celery stalks (with leaves), roughly chopped
1 parsnip, peeled and roughly chopped
5 large garlic cloves, smashed
1 leek, cleaned well and roughly chopped
9 cups water
2 bay leaves
A handful of flat-leaf parsley, roughly chopped
1 stalk lemongrass, split into four small pieces
2 Tablespoons coarse kosher salt (or to taste)

In a large stockpot, heat oil and sauté onions for about 5 minutes over medium heat. Add carrots, celery, parsnip, garlic, and leeks and sauté for another 3 minutes, until fragrant. Add water and bay leaves and bring to a boil. Reduce heat and let simmer for about one hour uncovered.

After one hour, add lemongrass, parsley, and salt, and simmer for another thirty minutes. Let soup cool a bit, then strain into a large bowl using a cheesecloth or mesh strainer. If desired, add some of the vegetables back (discard the rest). Serve hot as is or with matzah balls, noodles, kreplach, etc.

Leah Koenig

Vegetarian Chicken Soup, A schmaltz-free version of the Jewish classic cure-all.
Leah Koenig is a freelance writer whose work has been published in The New York Times Magazine, Gastronomica, Jewish Living, Lilith, Culinate, Beliefnet and other publications. Thank you http://www.myjewishlearning.com/culture/2/Food/Ashkenazic_Cuisine/Poland_and_Russia/chickensoup/vegetarianchickensoup.shtml


Garlic Flower Head. Artist: Julia Wright
Hello Everyone, This is White Buffalo Calf Woman. I have to say, this is a great broth recipe above with onions, carrots and celery, often referred to as the roe of soup and other sauce bases [Celery, onions, and carrots make up the French mirepoix]. However, I would not add lemongrass to my base soup. I feel it tastes and smells like old dish water to me, but others feel it's a citrus flavor.  Just be careful if you haven't used it before.  Everyone is different and have their own likes.  Lemongrass is not traditionally used in Jewish cooking, however traditionally Meat and Milk are never eaten at the same meal, to observe the sacred act of not eating together Mother (beef) and Child (milk) .


In this recipe, she calls to simmer uncovered for an hour.  I would cover and let simmer, rather than without a lid. This captures the flavor and reduces water loss. One thing that uncovered does do is make all the flavors condense, as we do with all bouillabaisse, traditionally a fish stew, however it is often referred as a condensing of flavors.

Bouillabaisse: [French, from Provençal bouiabaisso : boui, imperative of bouie, to boil (from Latin bullre, from bulla, bubble) + abaisso, imperative of abeissa, to lower (from Vulgar Latin *abbassire : Latin ad-, ad- + Medieval Latin bassus, low).]
Bouillon: [French, from Old French, from boulir, to boil, from Latin bullre, from bulla, bubble.]
Thank you http://www.thefreedictionary.com/

As you can see boiling, reducing (lower) and simmer is all part of any good broth. But at times, more soup base can heighten flavor. If one is satisfactory in taste without reducing, then simmering itself will allows greater flavor to be known.  Condensing and mingling of all flavors unite to make a rich broth.  One more thing, I do not strain from the soup, but tend to omit larger pieces not eaten but used for flavor, for instance dry fish.  All parts are edible in most soups, even if we don't think about it sometimes. The bulk of things (cellulose and fibers), keep our bowls healthy.  Enjoy your soup, especially during Winter Months. And don't forget to bless and prayer for the goodness from our Mother Earth and Father Sky. 


Your devoted servant,
White Buffalo Calf Woman your Twin Deer Mother
elder crystal person, wakan iyeshka or holy interpreter
alightfromwithin.org Rainbow Warriors of Prophecy


Fish Broth or Soup
Dry anchovies 
Boiling stock of water
Salt and lots. (The magic ingredient in chicken soup is salt.  Soups carry lots of salt and is an electrolyte your body needs.) 
Pieces of jalepeno
Pieces of garlic
Cracked pepper
Two Mexico Dry Chiles (which added to the richness of the soup)
Broccoli stalks cut into small pieces (for flavor and substance)
Together boil, reduce slightly, cover and simmer for 45 minutes +/-
Cilantro added before serving.  30 seconds to one minute immersed in hot soup.
Serve over hot rice or with hot bread and butter. 

note: Omit butter if one is using beef stock. As you can see soup is easy. Basic ingredients are boiling water, salt and garlic.  Everything else flavors your hot soup especially on Winter days. Look and see what you have in your kitchen.  I'll bet you can make a wonderful soup with what you have now. Have fun and don't forget to share.


Bouillon cube (US) or Stock Cube (UK and Australia)


A bouillon cube or stock cube is dehydrated broth (bouillon in French) or stock formed into a small cube about 15 mm wide. It is made by dehydrating vegetables, meat stock, a small portion of solid fat (such as hydrogenated oil), salt and seasonings and shaping them into a small cube. Dehydrated broth is also available in granular form.

Broth made from rehydrated cubes is different in taste from fresh broth because of its higher salt content and flavours changed by the boiling process. Bouillon cubes are convenient and inexpensive. The cubes are widely used in English cooking to add flavour, particularly in soups, stews and casseroles.

Bouillon cubes were commercialised by Maggi in 1908 and by Oxo in 1910 as a cheaper version of meat extract. By 1913, there were at least 10 brands available, with salt contents of 59–72%.

Its invention is attributed to Nicolas Appert in 1831 but the principle was known long before, and called portable soup. Thank you Wikepedia.

UNDERSTANDING SOUPS

The popularity of soups today may be due to increased nutrition consciousness, to a desire for simpler or lighter meals, or to an increased appreciation of how appetizing and satisfying soups can be. Whatever the reasons, they emphasize the importance of soup-making skills.
Soup, according to the dictionary, is a liquid food derived from meat, poultry, fish, or vegetables. This definition is all right as far as it goes, but there’s a lot it doesn’t tell us. Is a stock, straight from the stockpot, a soup? Is beef stew liquid enough to be called soup?


We’re interested more in production techniques than in definitions. However, a few more definitions are necessary before we can go into the kitchen, so we can talk to each other in the same language. Definitions aren’t rules, so don’t be alarmed if you hear other books or chefs use these terms differently. What matters is that you learn the techniques and are able to adapt them to many uses.

CLASSIFICATIONS OF SOUPS
Soups can be divided into three basic categories: clear or unthickened soups, thick soups, and special soups that don’t fit the first two categories. Most of these soups, no matter what their final ingredients may be, are based on stock

CLEAR SOUPS
Clear soups are all based on a clear, unthickened broth or stock. They may be served plain or garnished with a variety of vegetables and meats.


1. Broth and bouillon are two terms used in many ways. In general,they both refer to simple, clear soups without solid ingredients. We have already know that broth  is a flavorful liquid obtained from the simmering of meats and/or vegetables.
2. Vegetable soup is a clear, seasoned stock or broth with the addition of one or more vegetables and, sometimes, meat or poultry products and starches.
3. Consommé is a rich, flavorful stock or broth that has been clarified to make it perfectly clear and transparent.
Far from being just a plain old cup of broth,a well-made consommé is one of the greatest of all soups. Its sparkling clarity is a delight to the eye, and its rich, full flavor, strength,and body make it a perfect starter for an elegant dinner.

THICK SOUPS
Unlike clear soups, thick soups are opaque rather than transparent. They are thickened either by adding a thickening agent, such as a roux, or by puréeing one or more of their ingredients to provide a heavier consistency.


1. Cream soups are soups that are thickened with roux, beurre manié, liaison, or other added thickening agents, plus milk and/or cream. They are similar to velouté and béchamel sauces-in fact, they may be made by diluting and flavoring either of these two leading sauces. Cream soups are usually named after their major ingredient, such as cream of chicken or cream of asparagus.

2. Purées are soups that are naturally thickened by puréeing one or more of their ingredients. They are not as smooth and creamy as cream soups. dried legumes (such as split pea soup) or from fresh vegetables with a starchy ingredient such as potatoes or rice added. Purées may or may not contain milk or cream.
3. Bisques are thickened soups made from shellfish. They are usually prepared like cream soups and are almost always finished with cream. The term bisque is sometimes used on menus for a variety of vegetable soups. In these cases, it is really a marketing term rather than a technical term, so it is impossible to give a definition that covers all uses.
4. Chowders are hearty soups made from fish, shellfish, and/or vegetables. Although they are made in many ways, they usually contain milk and potatoes.
5. Potage is a term sometimes associated with certain thick,hearty soups,but it is actually a general term for soup. A clear soup is called a potage clair in French.

SPECIALTY AND NATIONAL SOUPS
This is a catch-all category that includes soups that don’t fit well into the main categories and soups that are native to particular countries or regions. Specialty soups are distinguished by unusual ingredients or methods, such as turtle soup, gumbo, peanut soup, and cold fruit soup. Cold soups are sometimes considered specialty soups, and, in fact, some of them are. But many other popular cold soups, such as jellied consommé, cold cream of cucumber soup, and vichyssoise (vee shee swahz) are simply cold versions of basic clear and thick soups
VEGETARIAN SOUPS AND LOW-FAT SOUPS
A great variety of vegetable-based soups are suitable for vegetarian menus. Vegetable soups for vegans must contain no meat or any other animal product and must be made with water or vegetable stock. To bind thick soups, use a starch slurry or a roux made with oil rather than butter. Lacto-vegetarians,on the other hand,accept soups containing butter, milk,or cream.


Because the appeal of vegetarian vegetable soups depends entirely on the freshness and the quality of the vegetables and not on the richness of meat stocks, be especially careful to use high-quality ingredients and to avoid overcooking.

Clear soups are especially suitable for people seeking low-fat foods. Consommés and clear vegetable soups are virtually fat-free, especially if the vegetables were not sweated in fat before being simmered.
Thick soups can be kept low in fat by thickening them with a slurry of starch (such as arrowroot, potato starch, or cornstarch) and cold water rather than with a roux. For cream soups, reduce or omit the cream and instead use evaporated skim milk.

Purée soups are usually more adaptable than cream soups to low-fat diets because the vegetable purée adds body and richness to the soup without requiring added fat. A little yogurt or evaporated skim milk can be used to give creaminess to a purée soup. Even garnishing a serving of soup with a teaspoonful of whipped cream gives a feeling of richness while adding only a gram or two of fat.

SERVICE OF SOUPS
STANDARD PORTION SIZES
Appetizer portion:6 to 8 oz (200 to 250 mL)
Main course portion:10 to 12 oz (300 to 350 mL)


GARNISH
Soup garnishes may be divided into three groups.
1.      Garnishes in the soup.
Major ingredients, such as the vegetables in clear vegetable soup, are often considered garnishes. This group of garnishes also includes meats, poultry, seafood, pasta products, and grains such as barley or rice. They are treated as part of the preparation or recipe itself, not as something added on.


Consommés are generally named after their garnish, such as consommé brunoise,which contains vegetables cut into brunoise shape [1?8-inch (3-mm) dice].
Vegetable cream soups are usually garnished with carefully cut pieces of the vegetable from which they are made. An elegant way to serve soup with a solid garnish is to arrange the garnish attractively in the bottom of a heated soup plate.This plate is set before the diner, and then the soup is ladled from a tureen by the dining room staff.

2. Toppings.
Clear soups are generally served without toppings to let the attractiveness of the clear broth and the carefully cut vegetables speak for themselves. Occasional exceptions
are toppings of chopped parsley or chives.
Thick soups, especially those that are all one color, are often decorated with a topping. Toppings should be placed on the soup just before service so they won’t sink or lose their fresh appearance. Their flavors must be appropriate to the soup.
Do not overdo soup toppings.The food should be attractive in itself.
Topping suggestions for thick soups:
Fresh herbs (parsley,chives),chopped
Fried herbs, such as parsley, sage, chervil, celery leaves, leek julienne
Fine julienne of vegetables
Sliced almonds,toasted
Grated cheese
Sieved egg yolks
Chopped or riced egg whites
Croutons
Grated parmesan cheese
Crumbled bacon
Paprika
Flavored butters
Flavored oils
Sour cream,crème fraîche,or whipped cream,either plain or flavored with
herbs or spices

3. Accompaniments.
American soups are traditionally served with crackers. In addition to the usual
saltines,other suggestions for crisp accompaniments are:
Melba toast
Corn chips
Breadsticks
Cheese straws
Profiteroles (tiny unsweetened cream-puff shells)
Whole-grain wafers

Thank you http://www.wizardrecipes.com/blog/understanding-soups.html

Rainbow Warriors of Prophecy
 
Winter heart, feels apart, but inside my heaven is praying to be a part. Glory be, share in me, the soul that fights to find liberty. Seek within, then begin, to realize how far you've come so far. Reach inside, feel with pride, forgive yourself for all you did. Now it's time, to find the time, to reach into your heart and give. Find some hope and trust the slope, down into the green grass home. Down where my soul does know to grow.  I leave you here, without any fear, because if you believe in God's magical world, then all you need, will show up just as you bleed (suffering for love and alive).  It's a heart that is real, always feeling inside my soul. And my belly receives all it's glow. I fill my bowl, with love from God, because all things come from this heart!

Rainbow Warriors of Prophecy

Monday, November 8, 2010

Chick Peas or Garbanzo Bean Recipes: Falafel or Hummus?

Fresh Chick Peas
Relatives, 
Bean dishes around the world, shown here, fresh "Chick Peas" or the "Garbanzo Bean", supply us with protein structures, our bodies need to sustain human life.  When and where meat is omitted from the diet, beans can offer a balance of carbohydrates and complete proteins, when mixed with whole grains. Around the world, cultures have passed down traditions that gift us pleasure and long life.  


We hope you enjoy, Rainbow Warrior's Favorite Recipes. Long live Daughters of Israel. Gathering commanders of kitchens around the world.  White Buffalo Calf Woman your Twin Deer Mother and Rainbow Warriors of Prophecy 


Written by Sara Hohn: Another one from the list of foods-I-didn’t-know-what-they-looked-like-fresh — These green, slightly furry pods each contain between one and three garbanzo beans (aka chick peas), a staple of Middle Eastern and Indian cuisines for thousands of years. Growing on a bushy plant, chick peas are ready to eat straight from the swollen pod – no soaking or cooking required. Younger, smaller peas taste sweet and approximate a regular green pea. The mature, plumped chick peas are a creamy yellow color resembling a tiny 1/2-inch brain, losing some of their sweetness to a nuttier, more complex flavor. Like sitting down with a basket of shelled peanuts, there’s something quite enjoyable in cracking open each chick pea pod for a tasty, fresh surprise inside.

falafel, felafel, pita

Falafel 

About Israel's signature food--plus, a recipe.

By Joan Nathan

Every Israeli has an opinion about falafel, the ultimate Israeli food, which is most often served stuffed into pita bread. One of my favorite spots is a simple stand in the Bukharan Quarter of Jerusalem, adjacent to Mea Shearim. The neighborhood was established in 1891, when wealthy Jews from Bukhara engaged engineers and city planners to plan a quarter with straight, wide streets and lavish stone houses. Reprinted with permission from The Foods of Israel Today (Knopf).
After the Russian Revolution, with the passing of time and fortunes, the Bukharan Quarter lost much of its wealth, but even so the area retains a certain elegance. There, the falafel is freshly fried before your eyes and the balls are very large and light. Shlomo Zadok, the elderly falafel maker and falafel stand owner, brought the recipe with him from his native Yemen.
Zadok explained that at the time of the establishment of the state, falafel--the name of which probably comes from the word pilpel(pepper)--was made in two ways: either as it is in Egypt today, from crushed, soaked fava beans or fava beans combined with chickpeas, spices, and bulgur; or, as Yemenite Jews and the Arabs of Jerusalem did, from chickpeas alone.
But favism, an inherited enzymatic deficiency occurring among some Jews--mainly those of Kurdish and Iraqi ancestry, many of whom came to Israel during the mid 1900s--proved potentially lethal, so all falafel makers in Israel ultimately stopped using fava beans, and chickpea falafel became an Israeli dish.
The timing was right for falafel in those early years, with immigrants pouring in. Since there was a shortage of meat, falafel made a cheap, protein-rich meal ; and people liked it.
Rachama Ihshady, daughter of the founder of another favorite Jerusalem falafel joint, Shalom's Falafel on Bezalel Street, told me that her family recipe, also of Yemenite origin, has not changed since British times. Using the basics taught to me by these falafel mavens, I have created my own version, adding fresh parsley and cilantro, two ingredients I like and which originally characterized Arab falafel in Israel.
Give me mine wrapped in a nice warm pita bread, swathed in tahina sauce and overflowing with pickled turnip and eggplant, chopped pep pers, tomatoes, cucumbers, amba (pickled mango sauce)--and make itharif, Hebrew for "hot." The type of hot sauce used, of course, depends on the origin of the falafel maker.

A Falafel Recipe

YIELD: ABOUT 20 BALLS
1 cup dried chickpeas         
1 teaspoon cumin
Half a large onion, roughly chopped (about 1 cup) 
1 teaspoon baking powder
4-6 tablespoons flour
2 tablespoons finely chopped fresh parsley
Soybean or vegetable oil for frying
Chopped tomato for garnish
2 tablespoons finely chopped fresh cilantro 
Diced onion for garnish
1 teaspoon salt 
Diced green bell pepper for garnish, diced cucumbers, mint leaves or diced fresh tomatoes
1 teaspoon dried hot red pepper 
Tahina sauce
4 cloves garlic  
Pita bread (any flat bread or whatever other bread you may have in the house will do also)
1. Put the chickpeas in a large bowl and add enough cold water to cover them by at least 2 inches. Let soak overnight, then drain. Or use canned chickpeas, drained.
2. Place the drained, uncooked chickpeas and the onions in the bowl of a food processor fitted with a steel blade. Add the parsley, cilantro, salt, hot pepper, garlic, and cumin. Process until blended but not pureed.
3. Sprinkle in the baking powder and 4 tablespoons of the flour, and pulse. You want to add enough bulgur or flour so that the dough forms a small ball and no longer sticks to your hands. Turn into a bowl and refrigerate, covered, for several hours.
4. Form the chickpea mixture into balls about the size of walnuts, or use a falafel scoop, available in Middle Eastern markets.
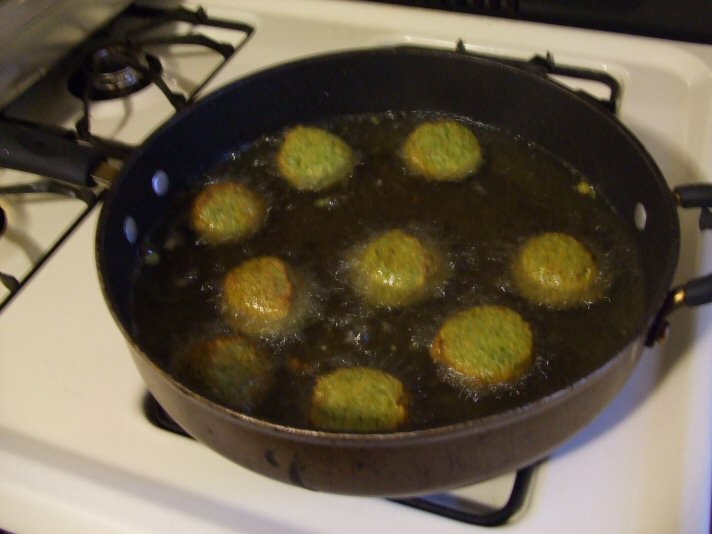
5. Heat 3 inches of oil to 375 degrees in a deep pot or wok and fry 1 ball to test. If it falls apart, add a little flour. Then fry about 6 balls at once for a few min utes on each side, or until golden brown. Drain on paper towels. Stuff half a pita with falafel balls, chopped tomatoes, onion, green pepper, and pickled turnips. Drizzle with tahina thinned with water.
Note:  Egyptians omit the cilantro and substitute fava beans for the chickpeas.


ALSO RECOMMEND

Israeli Hummus Recipe

You've seen it in the stores. Now you can make it at home. By Joan Nathan

I have been making hummus for years and have concluded that despite the temptation to use canned chickpeas, the flavor is much better when it is made with dried chickpeas found at Middle Eastern or Indian food stores. First I soak a large quantity overnight, cook some, and then drain and freeze the rest in two-cup batches in plastic bags.Reprinted with permission from The Foods of Israel Today (Knopf).
Whenever I need them for hummus, falafel, or for the many chickpea soups and stews in this book, I just take them out of the freezer. When substituting canned beans, figure that one cup of raw chickpeas equals two cups of cooked or canned. Some old-time cooks in the Middle East either peel cooked chickpeas or pass them through a food mill before using them. I find there is no need for this laborious extra step. I add to my hummus a little bit of cumin, which blends beautifully with the garlic and lemony flavor.


A Hummus Recipe

YIELD: About four cups, or six-to-eight servings
1 cup dried chickpeas (1 can 16oz, small batch)
1 cup tahina (2 tablespoon, small batch)
1/2 cup lemon juice, or to taste (less, small batch)

2 cloves garlic, or to taste (less, small batch)
1 teaspoon salt (to taste, small batch)
Freshly ground pepper to taste
1/2 teaspoon ground cumin, or to taste

3 tablespoons extra virgin olive oil
2 tablespoons pine nuts (small batch, optional)
Dash of paprika or sumac
2 tablespoons chopped fresh parsley or cilantro
1. Put the raw chickpeas in a bowl with cold water to cover and soak overnight.
2. Drain and rinse the chickpeas, then place them in a heavy pot with enough cold water to cover. Bring to a boil, then simmer, partially covered, for about an hour or until the chickpeas are soft and the skin begins to separate. Add more water as needed.
3. Drain the chickpeas, reserving about 1-1/2cups of the cooking liquid. Set aside 1/4cup of the cooked chickpeas for garnish. In a food processor fitted with a steel blade, process the remaining chickpeas with the tahina, lemon juice, garlic, salt, pepper, cumin, and at least 1/2 cup of the reserved cooking liquid. If the hummus is too thick, add more reserved cooking liquid or water until you have a paste-like consistency.
4. Heat a frying pan and add 1 tablespoon of the olive oil. Spread the pine nuts in the pan and stir-fry, browning on all sides.
5. To serve, transfer the hummus to a large, flat plate, and with the back of a spoon make a slight depression in the center. Drizzle the remaining olive oil on top and sprinkle the reserved chickpeas, pine nuts, paprika or sumac, and parsley or cilantro over the surface.
6. Serve with cut-up raw vegetables and warm pita cut into wedges
Note: You can also add cayenne pepper to the hummus. Sometimes leftover hummus tends to thicken just add some water to make it the right consistency.

Joan Nathan
Joan Nathan lived in Israel for three yeas where she worked for Mayor Teddy Kollek of Jerusalem. She is the author of several cookbooks, contributes articles on international ethnic food and special holiday features to The New York Times, Food Arts, Gourmet, and the B'nai B'rith International Jewish Monthly. Thank you Joan Nathan for your contribution to Falafel and Hummus. And Thank you http://www.myjewishlearning.com/culture/2/Food/Ashkenazic_Cuisine/Israel/Hummus.shtml


Rainbow Warriors of Prophecy
 
Image: Dried Chick Peas

Blessings come from a pod, bringing richness to our yards, gardens of paradise, that's what we see, the heart of abundance in you and me.  There is a seed, that knows to grow, into lush gardens overgrow, our heart believe in places of dreams, where all does flower and produce live, a green (grass home).

Thursday, May 28, 2009

BUFFALO VEGETABLE STEW


2 lbs buffalo meat
1/4 cup oil
2 large chopped onions
2 cloves of minced garlic
2 cups of corn
8 cups water
1 tsp.salt;
1 tsp.oregano;
1/2 tsp.pepper
4 carrots, sliced
3 potatoes, cubbed
1 green pepper(optional)

Directions
Cut buffalo in cubes, brown in oil. Put meat aside and saute garlic and onions in the buffalo oil. Return the meat into pan, add water, corn, salt, pepper. Cook for 2 hours, or until meat tender. Add the vegetables and continue to cook until done, about 30 minutes.


Visit WhiteBuffaloCalfWoman.Ning.Com

Friday, May 22, 2009

Habapotle Nirvana Salsa

Z.Monkey

Habapotle Nirvana Salsa

Haba-what? Habapotle, OK you have heard of a Chipotle, right? A smoke dried Jalapeno? Well, this is a smoke dried Habanero, one of the world hottest chiles. As far as I know I am the only person in the world that produces Habapotles because I created the process. I am trying to make a market for them, but these things are really, really hot, and not many people can stand them. For a normal heat level in a pot of beans you would add one of these Habapotles. This salsa is super extra crazy hot. It has 10 Jalapenos, 5 Habaneros, and 5 Habapotles. There is enough heat in this salsa to blow up a small island...

Nirvana, well we generally know what that means. In this context it means the intense endorphin rush you get when you think your head is going to catch on fire after eating this salsa. I often say it is like having a star in your mouth...

These are Habapotles in process...

Share
Attachments:

Reply to This

Habapotle Nirvana Salsa 10/06/2007
Michael Wriston CID+
Black Dog Engineering
The New Barbarian Style Cookbook

Habapotle Nirvana Salsa
Ingredients:
1x14 oz. Can whole tomatoes
1x10 oz. Can tomato sauce
10 Pounds of homegrown tomatoes diced
1 Large white onion diced
10 cloves of garlic finely chopped
15 fresh jalapenos rough diced
5 fresh habaneros finely chopped
5 dried habapotles ground
Juice of 2 large lemons
Sea salt to your taste
Place the whole tomatoes from the can in the food processor and puree them. Dump them in a stock pot over medium low heat (~25% power). Pour the tomato sauce in the stock pot. Dice the white onion and add it to the stock pot. Whenever you add something new to the stock pot stir it well. Take the garlic and the fresh habaneros and put them in the food processor. Process them until they are very fine. Add the garlic and habanero mash to the stockpot. Place the dried habapotles into a spice grinder and pulverize them into a power. Add the habapotle powder to the stock pot. Dice the jalapenos a few at a time and add them to the stock pot. Next dice the tomatoes and add them to the stock pot, one or two at a time. Once you have all the ingredients in the stock pot you will have a substantial amount of salsa. You will need to preserve this salsa
because you will probably not be able to eat this much salsa before it expires. I always have a stock of one pint canning jars on hand, just for this purpose. Let the salsa come up to a simmer and let it simmer for 15 minutes. Now is the time to taste the salsa and add salt. Do not underestimate the salt. It is absolutely essential to making your salsa taste right. Your canning jars should be sterilized as well as any tools that are used to handle the salsa going from the stock pot to the jars. Use a ladle or a large spoon to transfer the salsa from the stock pot into the jars. Fill each jar to ½ inch from the top. The airspace is essential for creating the vacuum inside the jar when the jars are done processing. As soon as the jar is filled place the lid on the jar and screw down the band to hold the lids in place. Continue filling the jars until the salsa in the stock pot is used up. If there is a partial jar leftover don’t process it in the canning process, just refrigerate it. Normally a canning process would use a boiling water bath on the stove to process the jars. I use the dishwasher to do this. My dishwasher has an extra hot setting which brings the temperature of the water close to boiling, which is lower than the boiling water bath, but the dishwasher will hold it at that temperature longer. So dishwasher processing is equivalent to boiling water bath processing. For boiling water bath processing allow the jars to process for 25 to 35 minutes. For dishwasher processing place the jars on the bottom shelf of the dishwasher and run the washer for the full cycle. It’s OK to use soap and wash your dishes at the same time, the bottles are already sealed. Note to self: I may need to change this page to only include the boiling water bath
method of canning and not include the dishwasher method. The boiling water method is acceptable to the USFDA. While the dishwasher method is not acknowledged at all.


Visit WhiteBuffaloCalfWoman.Ning.Com

Sourdough Pizza

Z.Monkey

Sourdough Pizza

I worked in a lot of pizza kitchens before I got an engineering job. Pistol Pete's Pizza, Mama's Pizza, Sbarro, Pizza Inn, Pizza Hut, and some more I don't remember. What all those bad jobs gave me was a great pizza making skills. Now-a-days I still make pizza, but its a LOT better than what you get from those fast food joints.

Sourdough is the fine art of aged bread dough. You can start with an aged culture (the starter) or you can sour regular dough by aging it. The substance that makes sourdough sour is alcohol. As the yeast lives in your dough it eats the sugars in the dough and converts them (through biological action) to alcohol. When you cook the dough you kill the yeast and cook away the alcohol, and what is left is the sour taste. Fresh dough tastes "green" to me. I am a connoisseur. You can age the dough up to a couple of weeks in the fridge. I usually make a 2 pound batch of 4 ounce dough balls and store them in a hard container in the fridge. I usually let it age at least two days before making a pizza with it. Note here that if you use an aged culture to start the dough you dont have to age it before using it because it already has the aged yeast culture in it.

These recipes that I am attaching all use an aged starter culture. I have to write another recipe for regular pizza dough to be aged.

Bon Appe'tit

Sourdough Starter 09/24/2006
Michael Wriston CID+
Black Dog Engineering
The New Barbarian Cookbook
Ingredients:
2 cups of unbleached unbromated high gluten flour
2 cups of spring water
1 tablespoon white sugar
1 tablespoon of granulated rapid rise yeast
Whisk all the ingredients together in a large bowl. Cover with a towel and let this sit on the counter for a few hours. It should bubble up and rise. This is why you want to use a large bowl. Stir up the mixture after 12 hours. Return to stir it every 12 hours after that. The longer this sits on the counter the more sour it will get. There are limits, however, if the mixture dries out or the yeast die the mixture will get taken over by mold. At this point it is considered bad, toss it. To prevent your sourdough starter from going bad put it into the refrigerator when you think the level of sour is right. This will lock in the moisture and put the yeast in suspended animation. To store the sourdough starter put it in a container with an airtight lid. Sourdough starter can be stored a long time but not forever. Always date your stored food. Sourdough starter is unique in the manner that it is a live culture and if you feed it, and treat it properly it will never die.
Maintaining your sourdough starter culture is relatively easy to do. Plus the advent of refrigeration makes that process a lot more forgiving. When ever you use some of the sourdough starter to make bread or pizza dough, you should replace what you took with 1 cup of flour and 1 cup of spring water. Mix the starter together again. Allow it to sit on the counter for a day or more, depending on you taste preference. Finally put it back in the refrigerator to store it until the next time you make bread.

Thin Crust Pizza 10/01/2006
Michael Wriston CID+
Black Dog Engineering
The New Barbarian Style Cookbook
Dough Ingredients:
2/3 cup of sourdough starter
1 cup spring water
1 teaspoon sea salt
1 tablespoon dark brown sugar
1 tablespoon olive oil
4 cups unbleached, unbromated high gluten bread flour
2 teaspoons granulated rapid rise yeast
Pizza Ingredients:
2 tablespoons of New Barbarian Style Pizza Sauce
½ cup of shredded mozzarella cheese
2 tablespoons parmesan cheese
20 slices of pepperoni
20 slices of pickled jalapeno
Making the dough (doh!):
You can make this dough by hand, but it is not recommended because the dough needs to be kneaded for at least 10 minutes to develop the gluten. That is fairly strenuous to do by hand. I recommend that you use a stand mixer or a bread machine to knead this dough. In the bowl of the stand mixer add the warm water, yeast, sugar, and salt. Whisk these ingredients together thoroughly. Then add the olive oil and sourdough starter, and whisk to combine. Add the flour on top of the liquid ingredients. Place the bowl on the stand mixer and secure. Use the dough hook attachment for kneading this pizza dough. Lower the hook into the bowl, and secure the head of the mixer. Turn the mixer on its lowest setting and knead the dough for 10 minutes. When the dough is ready it should form a single mass and pull away from the bowl. A properly kneaded dough ball will have cleaned all the flour mess out of the bowl and leave it sparkling clean. After the time has elapsed stop the mixer. Pull the dough hook out of the dough ball. Prepare a lidded cake pan or the equivalent to store the pizza dough by lining the pan with aluminum foil. Oil the foil with olive oil. Use your fingers to spread the oil around the foil evenly. This dough recipe produces 2 pounds of dough, so we want to divide the dough into 8 dough balls to yield ¼ pound dough ball. I use a kitchen scale to do this, that way I know I am getting uniform dough balls. After you make the dough ball place it in the oiled pan. When all the dough balls are formed place the lid on the pan and store the pan in the refrigerator until the dough is needed.

Forming the dough:
Thin crust pizza is meant to be cooked without a pan. To do this we need a pizza stone and a peel. The pizza stone is a round flat stone which is made of a ceramic material. The ceramic nature of the stone will allow it to store a lot of heat. It will literally cook the pizza from the bottom of the crust up. With this cooking method we don’t want a pan to get in the way of the heat so special considerations must be made to accommodate the dough with no pan. You will need some bench flour, a work surface, and a rolling pin. Flour the work surface. Retrieve one of the refrigerated dough balls and dust it with flour. Use your hands to flatten the dough ball into a disk. Continue to work the dough with your hands until the dough is about ¼ inch thick. Dust the dough with flour again and place it on the work surface. Using the rolling pin, start to flatten the dough adding extra flour if the dough sticks to the rolling pin. Rotate the dough and flatten it some more. Turn over the dough, add a little more flour and continue to flatten the dough using the rolling pin. Continue this process until the dough is stretched to a 12 inch disk and is very thin (0.050 inch). Sprinkle some flour or cornmeal on the pizza peel and then place the thin crust dough on the peel.

Making the Pizza:
This part of the recipe goes really fast. This pizza is cooked in an extremely hot oven and is done in five minutes. Preheat the oven to 500°F with the pizza stone on the middle rack. Roll out a dough ball. Sprinkle a little cornmeal on the pizza peel. Place the dough on the peel. Apply the New Barbarian Style Pizza Sauce to the dough and spread it around evenly to coat the dough taking care not to get it over the edge of the dough. Sprinkle the parmesan on top of the sauce. Evenly sprinkle the mozzarella on the pizza. Next add the pepperoni and jalapeno slices in a uniform arrangement. Now you are ready to cook the Thin Crust Pizza. You have to slide the pizza off the peel and onto the pizza stone. It will take some practice to be able to do this correctly. DO NOT leave the kitchen while this pizza is in the oven, it can go from done to charcoal in a minute. Once the pizza is in the oven set a timer for 5 minutes. At the 4 minute mark check the pizza. It is at this point that I rotate the pizza 180° to ensure even browning. Let the pizza cook for 1 more minute. To remove the pizza from the pizza stone take the pizza peel and slide it under the pizza, pick the pizza up, and take it out of the oven. I let the pizza sit on the peel for 30 seconds and then make 4 cuts with a pizza wheel. Slide the pizza off the peel onto a plate and serve.

Red Chile Pizza Dough 10/01/2006
Michael Wriston CID+
Black Dog Engineering
The New Barbarian Style Cookbook
Dough Ingredients:
2/3 cup of sourdough starter
1 cup spring water
1 teaspoon sea salt
1 tablespoon dark brown sugar
1 tablespoon olive oil
1 ancho chile ground fine
4 cups unbleached, unbromated high gluten bread flour
2 teaspoons granulated rapid rise yeast
Making the dough (doh!):
You can make this dough by hand, but it is not recommended because the dough needs to be kneaded for at least 10 minutes to develop the gluten. That is fairly strenuous to do by hand. I recommend that you use a stand mixer or a bread machine to knead this dough. In the bowl of the stand mixer add the warm water, yeast, sugar, and salt. Whisk these ingredients together thoroughly. Then add the olive oil and sourdough starter, and whisk to combine. Add the flour on top of the liquid ingredients. Place the bowl on the stand mixer and secure. Use the dough hook attachment for kneading this pizza dough. Lower the hook into the bowl, and secure the head of the mixer. Turn the mixer on its lowest setting and knead the dough for 10 minutes. When the dough is ready it should form a single mass and pull away from the bowl. A properly kneaded dough ball will have cleaned all the flour mess out of the bowl and leave it sparkling clean. After the time has elapsed stop the mixer. Pull the dough hook out of the dough ball. Prepare a lidded cake pan or the equivalent to store the pizza dough by lining the pan with aluminum foil. Oil the foil with olive oil. Use your fingers to spread the oil around the foil evenly. This dough recipe produces 2 pounds of dough, so we want to divide the dough into 8 dough balls to yield ¼ pound dough ball. I use a kitchen scale to do this, that way I know I am getting uniform dough balls. After you make the dough ball place it in the oiled pan. When all the dough balls are formed place the lid on the pan and store the pan in the refrigerator until the dough is needed.

Forming the dough:
Thin crust pizza is meant to be cooked without a pan. To do this we need a pizza stone and a peel. The pizza stone is a round flat stone which is made of a ceramic material. The ceramic nature of the stone will allow it to store a lot of heat. It will literally cook the pizza from the bottom of the crust up. With this cooking method we don’t want a pan to get in the way of the heat so special considerations must be made to accommodate the dough with no pan. You will need some bench flour, a work surface, and a rolling pin. Flour the work surface. Retrieve one of the refrigerated dough balls and dust it with flour. Use your hands to flatten the dough ball into a disk. Continue to work the dough with your hands until the dough is about ¼ inch thick. Dust the dough with flour again and place it on the work surface. Using the rolling pin, start to flatten the dough adding extra flour if the dough sticks to the rolling pin. Rotate the dough and flatten it some more. Turn over the dough, add a little more flour and continue to flatten the dough using the rolling pin. continue this process until the dough is stretched to a 12 inch disk and is very thin (0.050 inch). Sprinkle some flour or cornmeal on the pizza peel and then place the thin crust dough on the peel.


Visit WhiteBuffaloCalfWoman.Ning.Com